
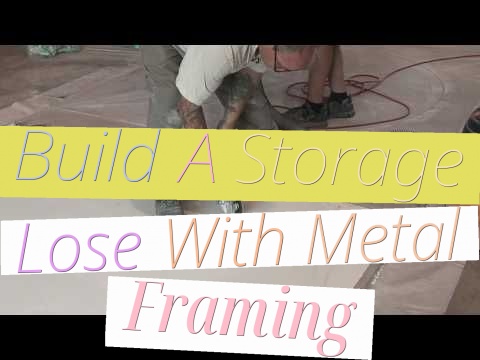
Construct your individual storage drop! The cost of them has absent from my price tag vary, so I created my own. In order for you a person crafted from steel framing, there are some things you will have to think about. Initial, you may need a method to chop the steel studs and monitor. I used a Chop Noticed that is certainly designed for reducing steel. If you’re employing a lighter gauge steel, you are able to cut it with a fantastic set of aviation snips. Future, you must have a spot to place your making that is certainly outside of the best way. You ought to have some concept of how massive a get rid of it will eventually consider to fulfill your requirements. You ought to sit down and draw out a tough image of what you need. It doesn’t have to be a blueprint. A straightforward drawing will do. The rationale for which is so that you can decide how much substance to acquire to create just one. A primary familiarity with framing is necessary, but yow will discover books about that subject matter at All those massive retail Building Source outlets. It can be quite basic, nevertheless.
Up coming, you will need to determine what type of roof you want to possess. If you want a plywood coated roof with shingles, you will have to help make the partitions slightly sturdier, mainly because that sort of roof is heavier. When you select a metal panel roof, There’s less of the load to the walls and they may be constructed which has a thinner gauge steel solution(less expensive). Next, you will need to select a door model. I created mine with only one opening. The doorway was vast as well as lose was reasonably little, so it really works for me. You are not building a residence, so Never go overboard in this article. The very last thing to consider is which kind of ground you want in the setting up. There’s two most important choices. Many of us like a stable concrete pad to make on. I built an higher than ground floor method in mine. For those who will shop anything like an ATV or other weighty rolling item just like a yard tractor, it is best to almost certainly make use of the concrete slab. If you end up picking an previously mentioned ground technique, place it on blocks or some other strategy to guidance the ground. I poured concrete corner pads to carry up my building. OK, let’s get going.
Construct your ground assist system, 1st. If you would like a concrete pad, pour it now. When it has put in place at the very least a single comprehensive working day, you can start to construct on it. When I poured the corner pads of my constructing, I’d to build a flooring method along with it. Uncomplicated, actually. Metal framing comes it two simple models. Metallic studs are the vertical pieces and metal keep track of is the horizontal part that the steel studs in good shape into. I made a framework of studs and monitor that was the scale of the floor from the drop. I positioned studs every 24 inches inside the observe. Because it was a flooring technique, I set double studs in, again to back again. this enhanced the energy of the ground process. Following, I coated them with 3/four inch plywood to make a sound ground. At this stage, you can be at exactly the same area that the person who chose a concrete slab is.
Now that you have a flooring, it is time to Develop the partitions. It is really a good idea to lay out the walls in your ground. Draw the metallic stud wall thickness throughout the fringe of the floor, holding in your mind wherever your door will go. Then draw that about the wall outline. Your door opening need to be a tough opening size instead of the concluded measurement of your doorway. For your fundamental, four wall constructing, two of the partitions needs to be The full duration of your respective making. one other two is going to be In the marks you manufactured on the floor. After getting these Proportions, you are all set to begin design on the walls. Begin with a wall that doesn’t have the door. Position one of many horizontal keep track of parts to the marks you produced with the wall. If It really is lengthier than the floor, cut it to the correct duration. Now Slice Yet another the identical measurement. these are definitely the upper and reduce items from the wall. Put them side by side and come up with a mark each and every 24 inches ranging from the tip with the observe on the two pieces. These are typically the destinations in the vertical stud placements. Choose your studs, the vertical pieces, and insert them in The 2 keep track of parts to complete the wall area. Now go ahead and take fastener screws and protected the studs in posture on either side of your observe. It truly is less complicated if you are doing one particular facet very first, then convert it above and do the other facet.
When entire, have a scrap piece of steel or wood, just about anything that can be utilized to be a brace, and attach it to among the list of vertical studs about two feet down from your major from the wall. This may be accustomed to brace the wall area after you stand it up. In case you have a wooden ground, It is simple to screw the wall to the ground method. If you employ a concrete slab ground, You will need a way to connect the wall towards the concrete. It is possible to shoot it down which has a powder actuated Instrument, travel a nail in with the influence Instrument and hammer or you’ll be able to pre drill holes and use a masonry screw much like the “Tapcom” method. Whatever approach you use, go on and stand the wall part up and brace it perfectly. You can start to really feel a sense of accomplishment for all your function whenever you see a wall standing. Use that exhilaration that will help you complete the opposite 3 partitions. If you come to the wall part which includes the doorway, put the studs on both facet with the rough opening and set a horizontal header bit of track over the rough opening gap. Measure the remaining length to the highest keep track of and set up the Minimize down stud pieces more than the doorway gap during the door header monitor. Sustain the exact same 24 inch spacing as the remainder of the studs while in the wall. At this time, you should have the 4 partitions standing and so are Prepared for the following action. Prior to we go on, I must point out the significance of holding every thing stage , sq., straight and plumb. It is best to check this stuff as you go together. One more factor to recall would be to usually wear safety glasses when working with any power resources, not merely these. It is also beneficial to dress in gloves when managing metal studs and keep track of. There are lots of sharp edges to Be careful for, so use caution.
The roof is another step. Get by yourself a ladder and make format marks on the top in the wall track parts. In the event your plan calls for a roof without having overhangs, factors will go quicker. The items of stud you’ve got designed into trusses will probably be hooked up towards the observe where you designed the marks. Once more, 24 inches on center will be ample. These trusses are created by you to fit your roof style and design. On the other hand you style it, it should have not less than 1 foot of rise to every 4 toes of operate. Because of this If the lose was 8 toes extensive, the height at the peak of your roof will likely be not less than a person foot superior. A sixteen foot wide setting up could be two ft, and so on. This is certainly so that if it snows close to you, your roof will Enable it slide off in advance of it gets much too thick and collapses your developing. Now let us examine making the trusses. On your function table, lay out a bit of stud that could span from wall to wall. Here is the base with the truss. Obtain the middle and put an upright piece there that provides you with the ratio I reviewed before. You may screw it to The underside piece at the middle mark you made. Now, in the best of it, measure the distance to the top of the stud. It should be exactly the same for each side. Cut People parts of stud and fasten them.
When you’re concluded, you need to have a triangular framework using an upright piece in the middle. Except you might be producing a protracted span, this composition will likely be plenty of to deal with the roof load for the lose. Make a single of these For each and every mark you designed on top of the very best track of the walls. These trusses might be screwed to the highest observe each 24 inches. It will probably be simpler to place up the primary one particular while in the entrance and the last a person in the back. This will assist you to extend a string throughout at the height on the trusses. Use this to align the opposite trusses into a straight line. When you’ve got to screw down the ends of the trusses to the top from the wall monitor, Slash a scrap of either stud or keep track of into a ninety degree angle piece which you could screw into the facet with the truss and the very best with the wall observe to carry it in position. once you have the trusses screwed in position, you’ll want to set a scrap of stud or observe throughout the trusses and screw it down quickly. This retains the tops with the trusses in position while you set the everlasting cross parts in position. I used a seven/eight inch hat channel to cross the trusses. Hat channel is termed that since it appears like a hat in cross segment. The two flat sides (The brim from the hat) are screwed for the truss every single 24 inches down from the height from the truss. The highest of the hat incorporates a flat location where you will screw the roof panel down on to the hat channel.
Now, in critique, you will have a hat channel screwed down to each truss and down from the height of the trusses each individual 24 inches. Like that, once you lay a roof panel down on this framework, you can screw it down every 24 inches, making a very sturdy steel roof which is not way too weighty. At this point, Once you full the set up with the roof panels, it is going to grow to be evident that you choose to want one thing to address the ridge at the best within your roof. This could be a product identified as a ridge cap. It can be screwed down in excess of the sign up for location concerning the roof panels. At this point you should have a shedding roof above your building. Usually there are some specifics to discuss right here. If you would like an overhanging roof, calculate how considerably out you want it to go and measure around the peak of the trusses. That measurement is going to be how much time to cut your panels. Set the cut element of your panel at the best. It’ll be hidden with the ridge cap. If you need a flush roof, the measurement is going to be from the sting in the truss at the very best from the wall to the height on the roof. If you prefer a flush roof, make sure to work out the thickness of a hat channel as well as steel panel that covers it for that wall masking. Your roof really should extend not less than 1/four inch past that point.
Now we’re all set to get started masking the partitions. Mark off a 24 inch mark in the best of your respective wall to The underside on all four corners. Use that mark to setup a hat channel horizontally 24 inches apart all around your making. In case you have planned cautiously, a 26 inch huge metal panel will wrap across the corner of one’s setting up. Place fifty percent on 1 facet and wrap the opposite facet round the corner. I did mine this way since I couldn’t look for a seller that had any corner trim items. None the a lot less, it really works perfectly and once you wrap the panels round the corner, there are no drafty corners. When you put in the panels, screw them into the hat channels mounted each 24 inches. This boosts the power on the partitions. Proceed to wrap the panels close to right up until you reach the doorway. There you could Lower the panel to suit and lap around the other panel to finish the wrap with the developing. The fundamental framework is finish. The only points remaining to carry out are to set up your door and some trim parts about your new constructing. You will find there’s three inch trim piece made for flashing a roof. that can work well for closing the gap amongst the wall panels and the roof panels.
To setup them, undo The underside screw of your respective roof panels within the facet that you are trimming out. Slide the trim piece underneath the roof panel and around the wall panel. Re put in the screws you eliminated. After you wrap everything round the constructing, your constructing will get rid of rain and you also are ready to drive during the tractor.
A ultimate thought and some information. You should You should not get the job done by itself. You could possibly be wounded conveniently if a wall portion broke unfastened and fell on you. Aside from, It is simpler If you have someone that will help hold items. The other factor was that you’re going to want some particular resources To achieve this position. It can be achieved with out A lot of them Nonetheless they make The work less complicated. To start with, you need a fantastic screwgun or simply a drill by using a screwdriving suggestion. Go for the magnetic little bit holder that holds screws well. I’ve had lots of evil thoughts immediately after dropping many screws. You will also come across a few of These Vise Grip sort C clamps helpful. Utilize them to carry the stud and track with each other with your mark once you screw them with each other. For Specific cuts, I utilized a mini grinder to generate the angle cuts of your roof trusses. You’ll have a great degree in addition to a framing sized square. And one more matter. When you buy screws for the framing, get The sort that have a drill place on the suggestion. It saves lots of pushing. Usually continue to keep security in mind then go brag to your neighbors!